10.3. Création de l'Action 1222 Répondre
10.3.1. Creating Action 1222 Reply
Similarly, actions are created to reply to the message and forward the message.
To create an action 1222 Reply:
10.3.1.1. Call the context menu of the folder 1200 Comments by right-clicking the mouse;
10.3.1.2. Select New Object > Form;
10.3.1.3. In the Properties window, enter 1222 in the Object Code field, enter enter Reply in the Object Name field;
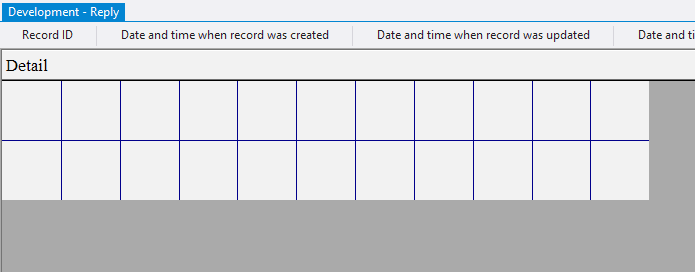
10.3.1.4. Open object 1222 Reply for modification by double-clicking the left mouse button;
Note: if you want to study form design process in detail, follow the steps 10.3.1.5 - 10.3.1.122. If you already know how to do this, skip the steps 10.3.1.5 - 10.3.1.122 and go to the step 10.3.1.123.
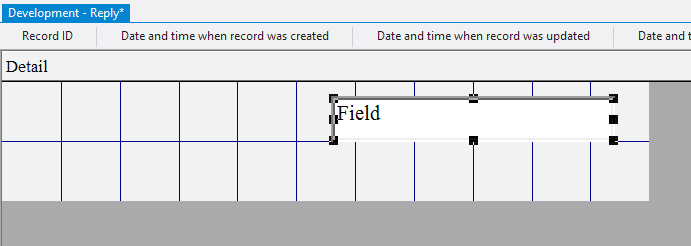
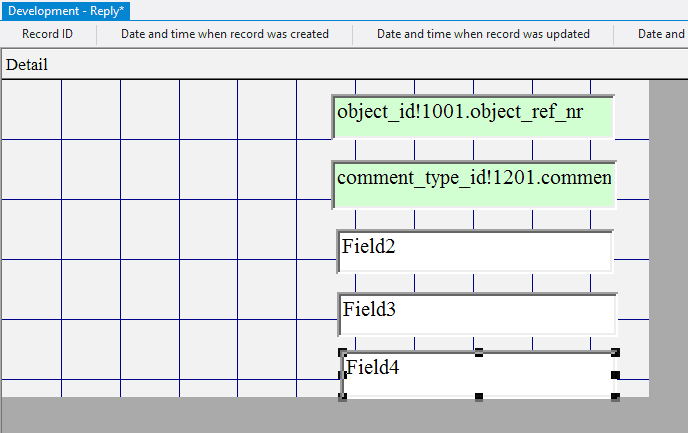
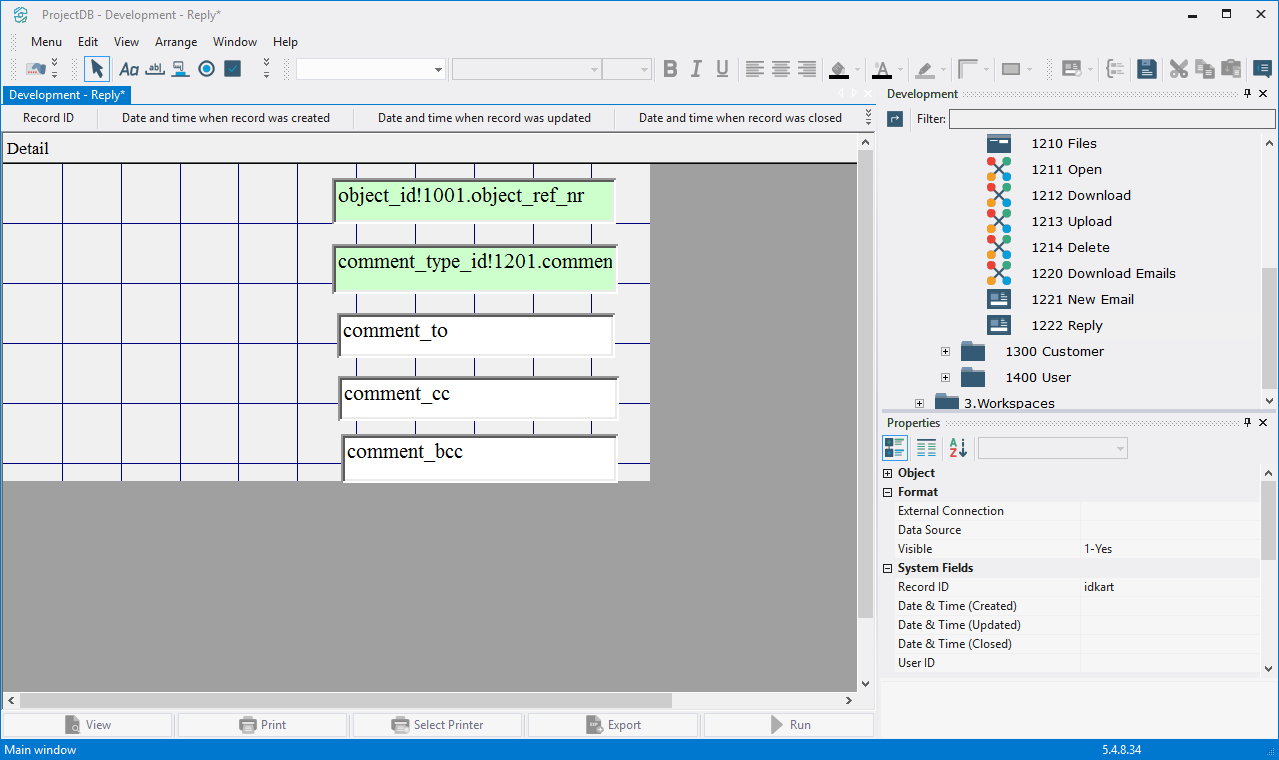
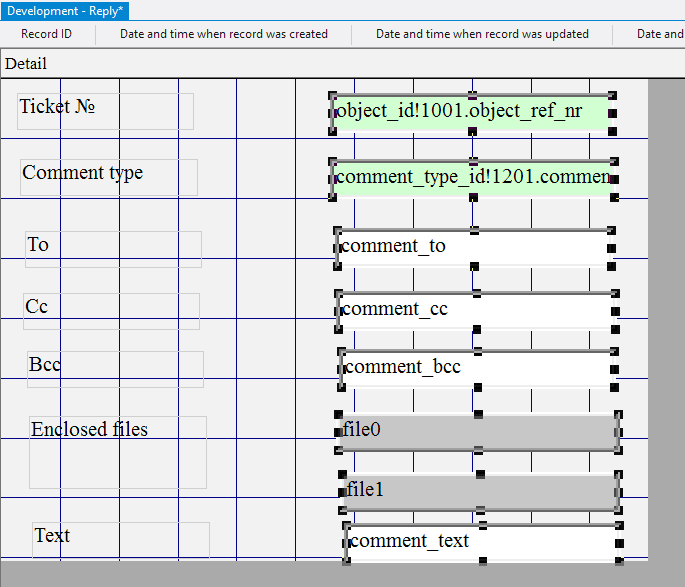
10.3.1.5. Click the left mouse button on the Field button on the toolbar;
10.3.1.6. Move the mouse pointer to the data area;
10.3.1.7. Press the left mouse button and, without releasing it, outline the size of the field;
10.3.1.8. In the Control Source field, click the Advanced button;
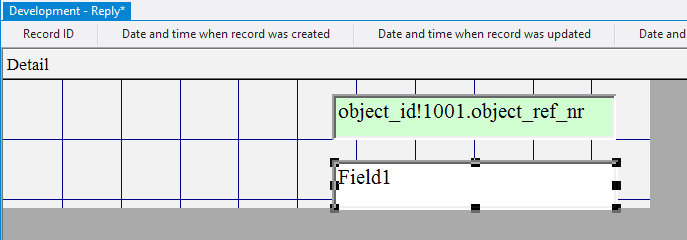
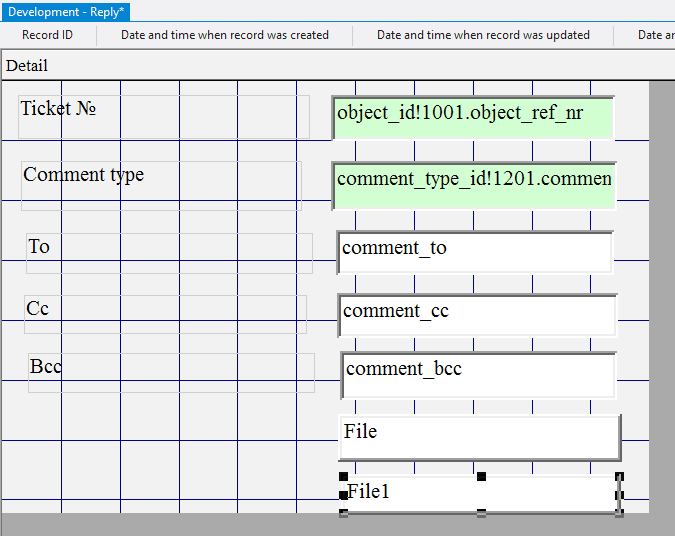
10.3.1.9. In the appeared window enter object_id!1001.object_ref_nr;
10.3.1.10. Click the Save button;
10.3.1.11. In the Enabled field, specify the value 0-No;
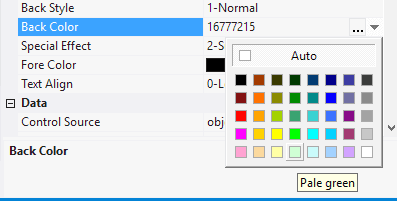
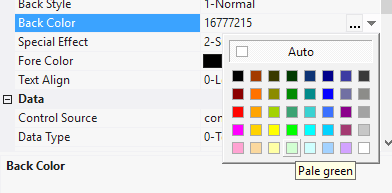
10.3.1.12. In the Back Color field, select the background color;
10.3.1.13. Similarly, add one more field below;
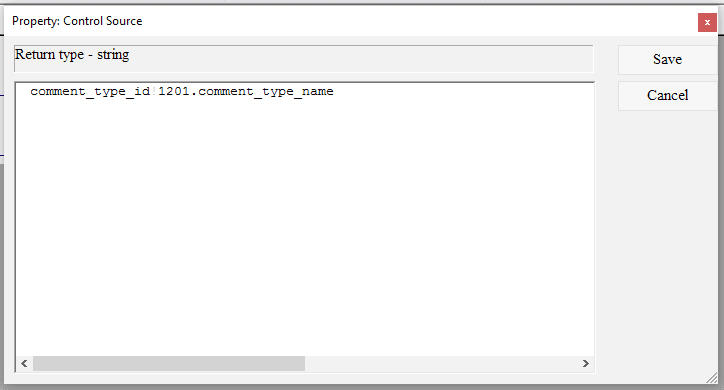
10.3.1.14. In the Control Source field, click the Advanced button;
10.3.1.15. In the appeared window enter comment_type_id!1201.comment_type_name;
10.3.1.16. Click the Save button;
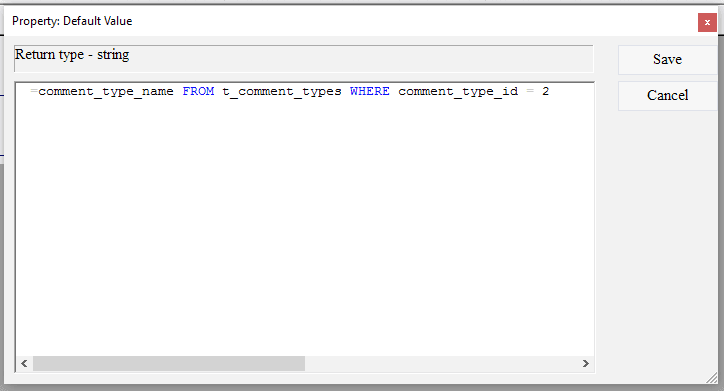
10.3.1.17. In the Default Value field, click the Advanced button;
10.3.1.18. In the appeared window enter =comment_type_name FROM t_comment_types WHERE comment_type_id = 2 - this will automatically set the comment type Outgoing message when the action is run;
10.3.1.19. Click the Save button;
10.3.1.20. In the Enabled field, specify the value 0-No;
10.3.1.21. In the Back Color field, select the background color;
10.3.1.22. Similarly, add three more fields (each subsequent lower than the previous one);
10.3.1.23. In the Control Source field for each added field enter comment_to, comment_cc, comment_bcc, respectively;
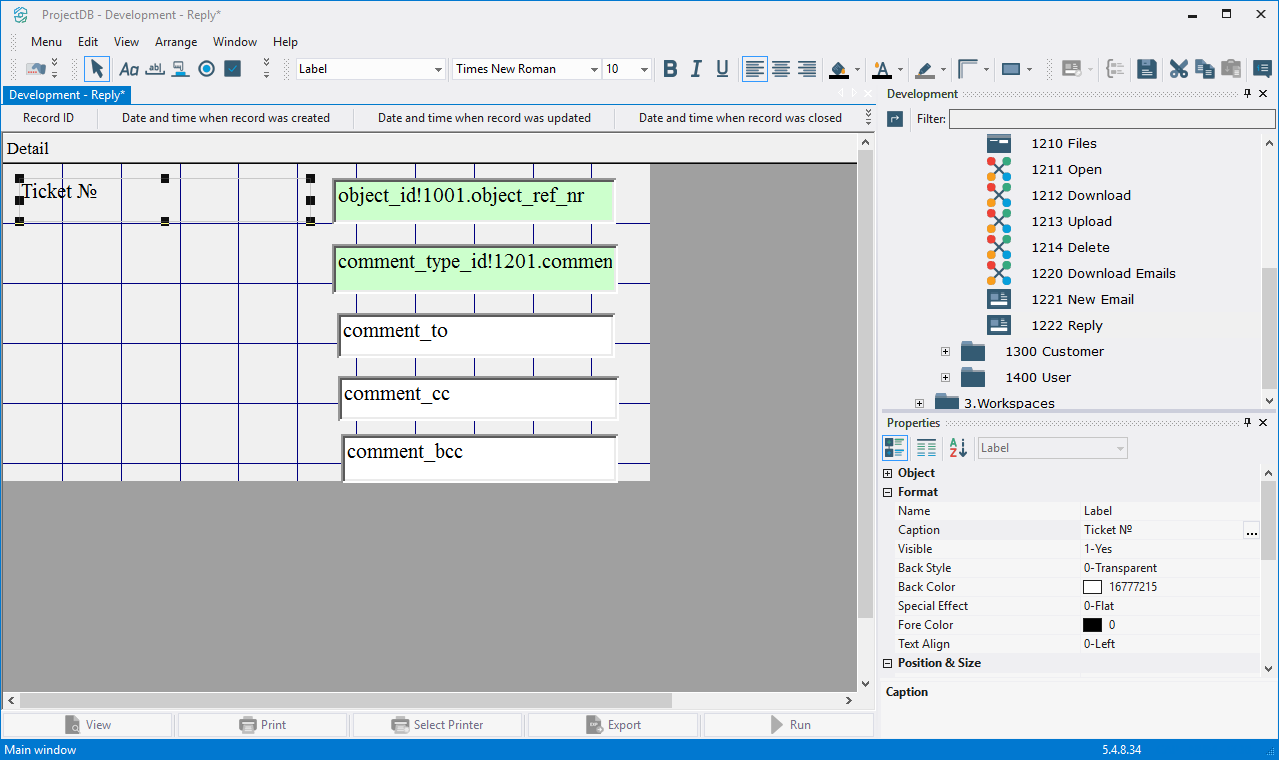
10.3.1.24. Left-click on the Label button on the toolbar;
10.3.1.25. Move the mouse pointer to the data area;
10.3.1.26. Press the left mouse button and, without releasing it, outline the size of label so that the label is left to the top field;
10.3.1.27. In the Caption field enter the Ticket №;
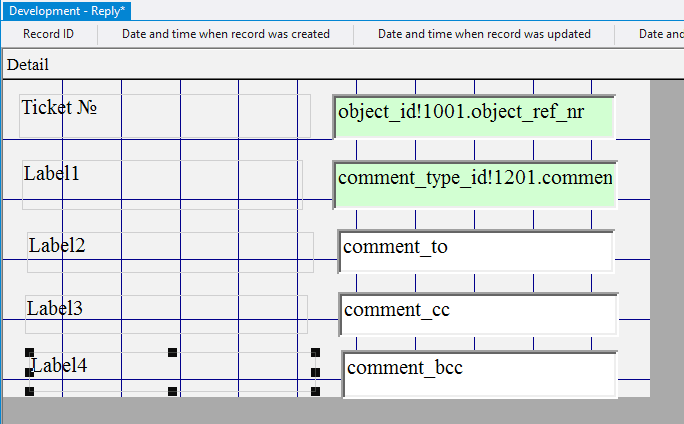
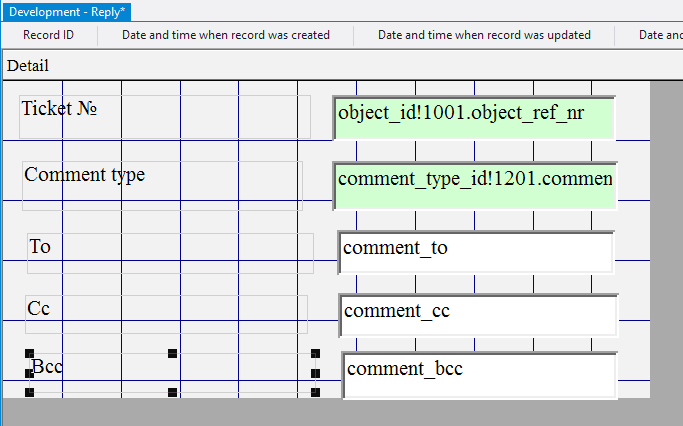
10.3.1.28. Similarly, add four more labels (one to the left of each field);
10.3.1.29. In the Caption field of each of the labels enter Comment type, To, Cc, Bcc;
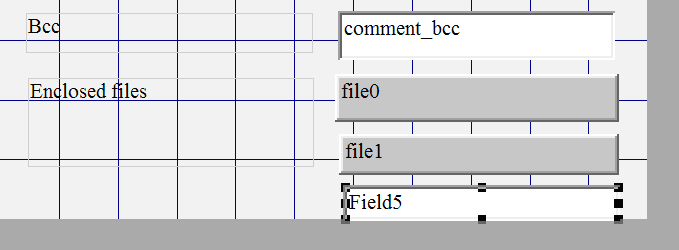
10.3.1.30. Similarly add two elements of the file type;
10.3.1.31. In the Back Color field for each of the added elements of the file type, specify the color;
10.3.1.32. In the Name field for each of the added items of the file type, type file0 and file1;
10.3.1.33. Add a label to the left of the file element;
10.3.1.34. In the Caption field, enter Enclosed files;
10.3.1.35. Add one more field below;
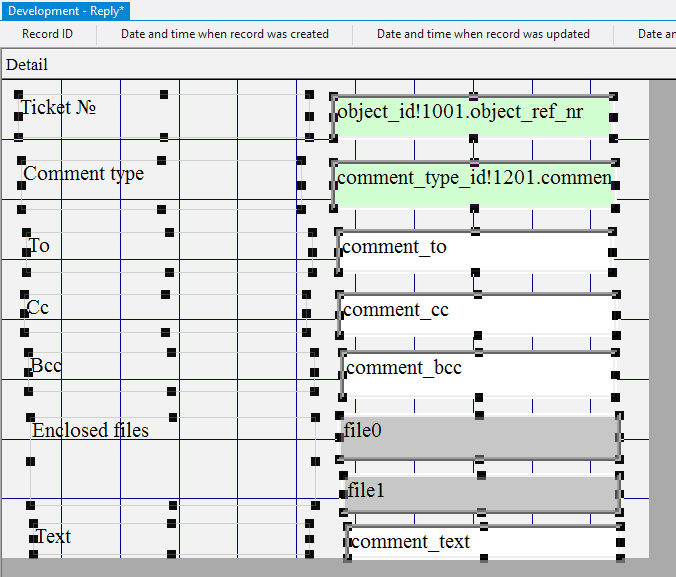
10.3.1.36. In the Control Source field enter comment_text;
10.3.1.37. Add a Label to the left of the last field added;
10.3.1.38. In the Caption field, enter Text;
10.3.1.39. Select field comment_to;
10.3.1.40. In the field Default Value enter =[1202].[comment_from] - allows to automatically take a value from the "From" field and substitute this value in the "To" field of the new message when replying to the message;
10.3.1.41. Select field comment_cc;
10.3.1.42. In the field Default Value enter =[1202].[comment_from] - allows to automatically take a value from the "Cc" field and substitute this value in the "Copy" field of the new message when replying to the message;
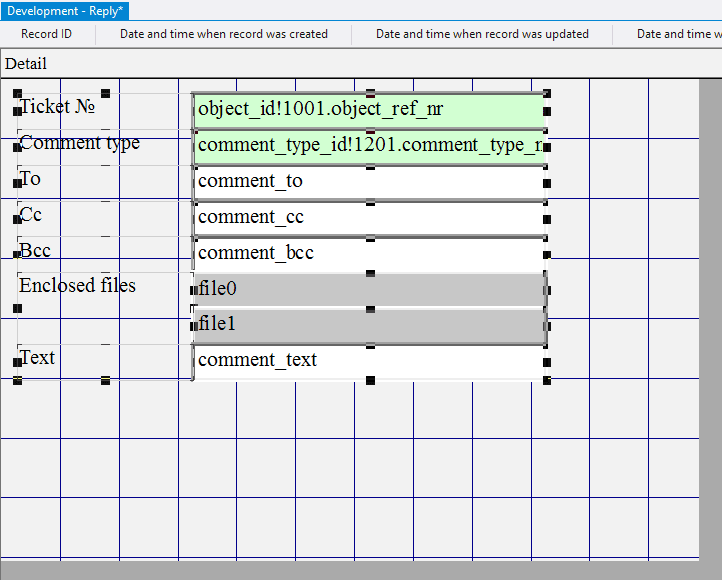
10.3.1.43. Select Edit > Select All;
10.3.1.44. In the Height field specify the height of the elements - 0,6; press the Enter key;
10.3.1.45. Select label Enclosed files;
10.3.1.46. In the Height field specify the height of the elements - 1,2; press the Enter key;
10.3.1.47. Select all the labels by clicking the left mouse button and, without releasing it, outlining the area on the screen with the mouse pointer;
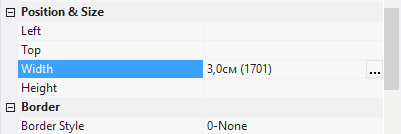
10.3.1.48. In the Width field specify the width of the labels - 3; press the Enter key;
10.3.1.49. Select all fields;
10.3.1.50. In the Width field specify the width of the fields - 6; press the Enter key;
10.3.1.51. Select Edit > Select All;
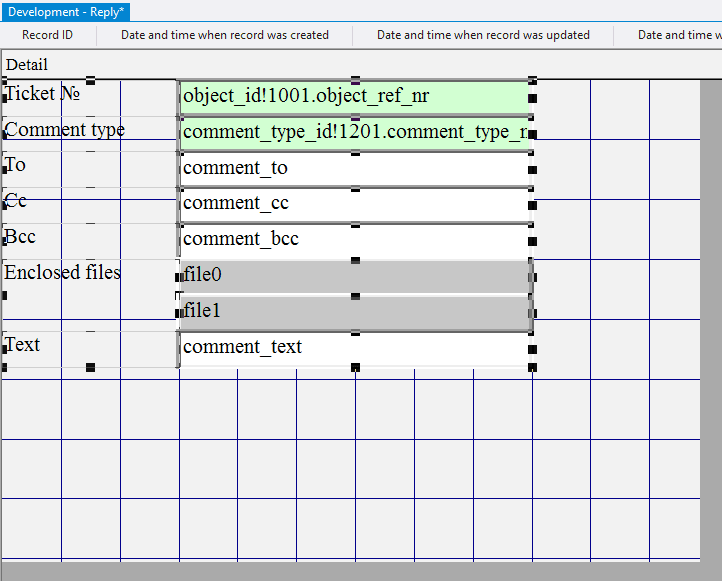
10.3.1.52. Select Arrange > Align > Top;
10.3.1.53. Select Arrange > Align > Left;
10.3.1.54. Move the mouse pointer over the elements, press the left mouse button and, without releasing it, move all the elements in the upper left corner;
10.3.1.55. Move the mouse pointer to the lower right corner of the data area, press the left mouse button and, without releasing it, reduce the size of the data area to a minimum;
10.3.1.56. Select the field comment_text - this field will occupy the remaining free space when working in the form and store multi-line text, so you should allow the text to scroll vertically by setting the Scroll Bars field to 2-Vertical;
10.3.1.57. Left-click outside the data area;
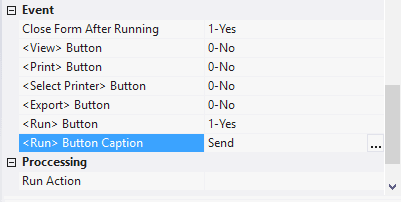
10.3.1.58. In the Close Form After Running field, set the value to 1-Yes;
10.3.1.59. In the <View> Button field, set the value to 0-No;
10.3.1.60. In the <Run> Button field, set the value to 1-Yes;
10.3.1.61. In the <Run> Button Caption, enter Send;
10.3.1.62. In the <Run> Action field, click the Advanced button;
10.3.1.63. In the appeared window call the context menu;
10.3.1.64. Select Add Action;
10.3.1.65. In the Name field enter the First file;
10.3.1.66. In the Action Type field, select 13-Set variables;
10.3.1.67. In the Variable Type field, select 3-AF (Array of Files);
10.3.1.68. In the Variable Value field, enter =[file0] - to initialize the first attached file;
10.3.1.69. Call the context menu;
10.3.1.70. Select Add Action;
10.3.1.71. In the Name field enter Second file;
10.3.1.72. In the Action Type field, select 13-Set variables;
10.3.1.73. In the Variable Type field, select 3-AF (Array of Files);
10.3.1.74. In the Variable Value field, enter =[file1] - to initialize the second attached file;
10.3.1.75. Call the context menu;
10.3.1.76. Select Add Action;
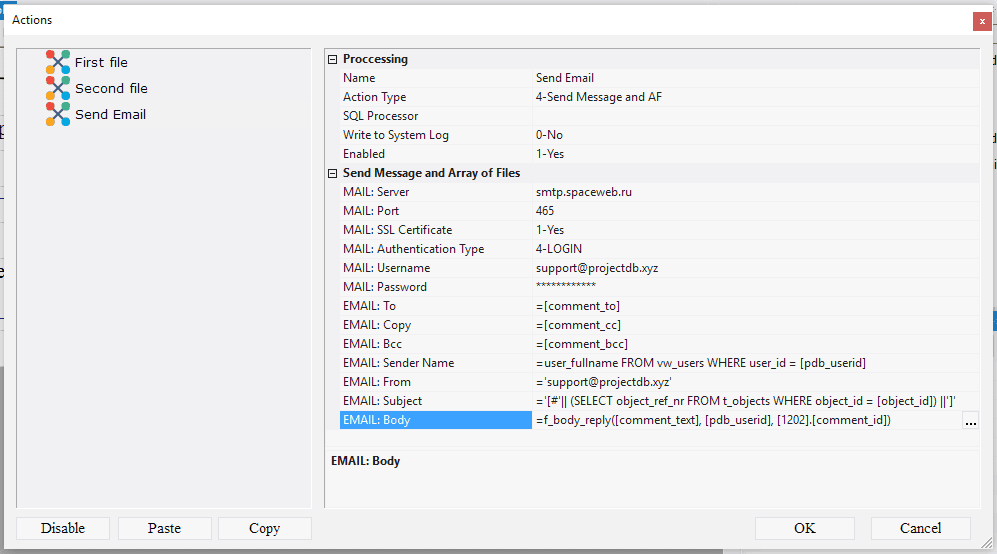
10.3.1.77. In the Name field enter Send Email;
10.3.1.78. In the Action Type field select 4-Send message and AF;
10.3.1.79. In the MAIL: Server field specify the server name (smtp.gmail.com for Gmail);
10.3.1.80. In the MAIL: Port field specify the port (465 for Gmail);
10.3.1.81. In the MAIL: SSL certificate field specify the use of the certificate (1-yes for Gmail);
10.3.1.82. In the MAIL: Authentication Type field specify the authentication type (4-LOGIN for Gmail);
10.3.1.83. In the MAIL: Username field enter username (in this example, projectdb.test);
10.3.1.84. In the MAIL: Password field enter password;
10.3.1.85. In the EMAIL: To field enter =[comment_to];
10.3.1.86. In the EMAIL: Copy field enter =[comment_cc];
10.3.1.87. In the EMAIL: Bcc field enter =[comment_bcc];
10.3.1.88. In the EMAIL: Sender Name field enter =user_fullname FROM vw_users WHERE user_id = [pdb_userid];
10.3.1.89. In the EMAIL: From field enter the sender's address ='projectdb.test@gmail.com ';
10.3.1.90. In the EMAIL: Subject field enter ='[#' || (SELECT object_ref_nr FROM t_objects WHERE object_id = [object_id]) || ']';
10.3.1.91. In the EMAIL: Body field enter =[comment_text] || chr (13) || chr (10) || chr (13) || chr (10) || chr (13) || chr (10) || (SELECT user_signature FROM t_users WHERE user_id = [pdb_userid]);
Note: the variables [comment_to], [comment_cc], [comment_bcc], [comment_text] are in form 1222, so it is possible to refer directly to variables. The variable [comment_id] is in the table 1202 Comments (base), so you need to specify the object, and then the object variable - [1202].[comment_id]. The variable [pdb_userid] is the global variable - the ID of the current user. This variable is available throughout the user's work in the system.
10.3.1.92. Call the context menu;
10.3.1.93. Select Add Action;
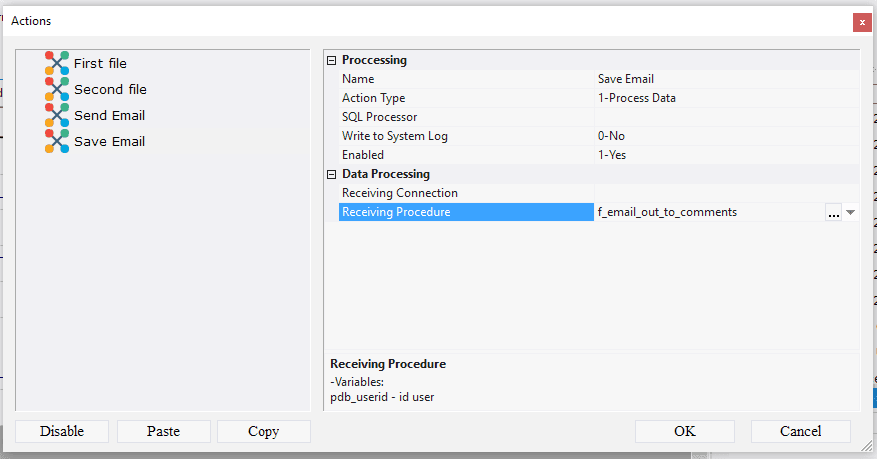
10.3.1.94. In the Name field enter Save Email;
10.3.1.95. In the Action Type field select 1-Process Data;
10.3.1.96. In the Receiving Procedure field select f_email_out_to_comments;
10.3.1.97. Call the context menu;
10.3.1.98. Select Add Action;
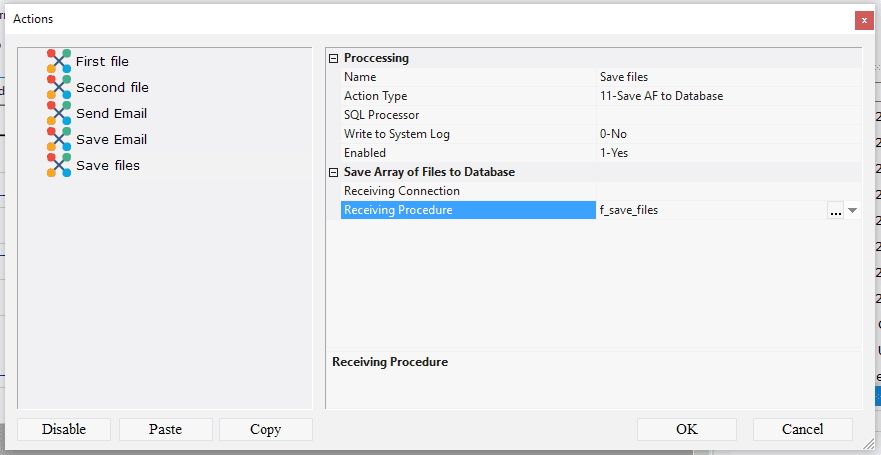
10.3.1.99. In the Name field enter Save Files;
10.3.1.100. In the Action Type field select 11-Save AF to Database;
10.3.1.101. In the Receiving Procedure field select f_save_files;
10.3.1.102. Call the context menu;
10.3.1.103. Select Add Action;
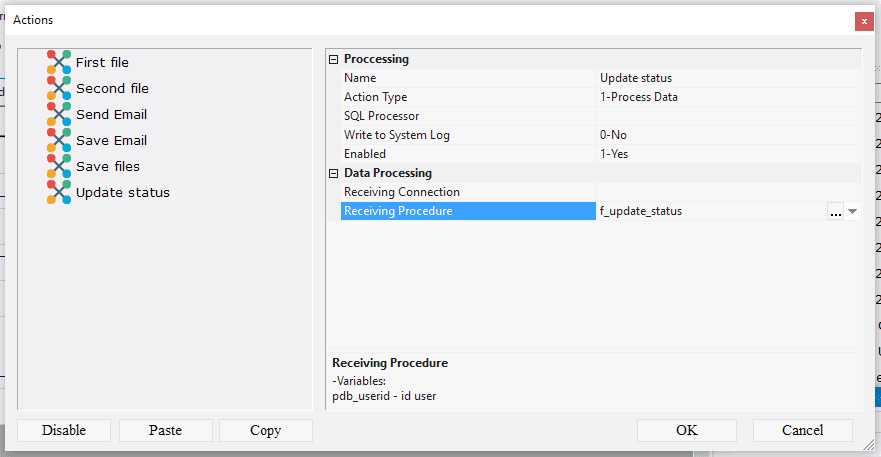
10.3.1.104. In the Name field enter Update status;
10.3.1.105. In the Action Type field select 1-Process Data;
10.3.1.106. In the Receiving Procedure field select f_update_status;
10.3.1.107. Call the context menu;
10.3.1.108. Select Add Action;
10.3.1.109. In the Name field enter Update 1001;
10.3.1.110. In the Action Type field select 14-Refresh Object;
10.3.1.111. In the Object field select 1001 Tickets (base);
10.3.1.112. Call the context menu;
10.3.1.113. Select Add Action;
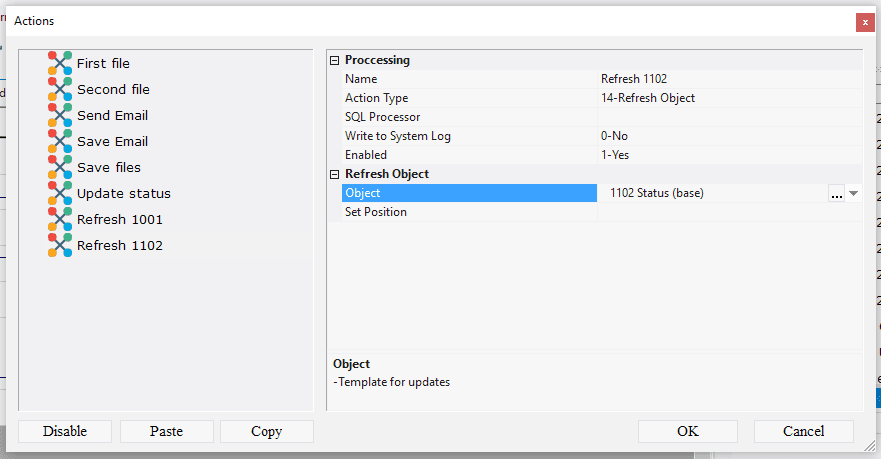
10.3.1.114. In the Name field enter Refresh 1102;
10.3.1.115. In the Action Type field select 14-Refresh Object;
10.3.1.116. In the Object field select 1102 Status (base);
10.3.1.117. Call the context menu;
10.3.1.118. Select Add Action;
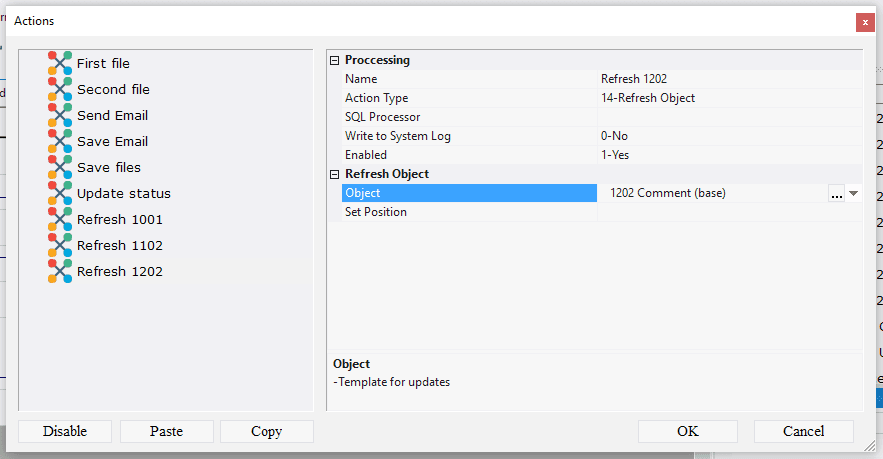
10.3.1.119. In the Name field enter Update 1202;
10.3.1.120. In the Action Type field select 14-Refresh Object;
10.3.1.121. In the Object field select 1202 Comment (base);
10.3.1.122. Click OK;
Note: If you followed the steps 10.3.1.5 - 10.3.1.122, skip steps 10.3.1.123 - 10.3.1.132 and go to step 10.3.1.133.
10.3.1.123. Download the file archive containing the settings of objects;
10.3.1.124. Extract the files from the downloaded archive;
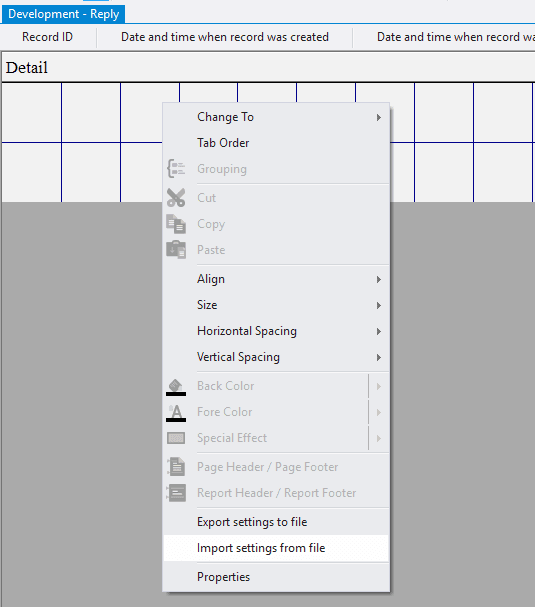
10.3.1.125. Open the context menu by right-clicking in the data area;
10.3.1.126. Select the menu item Import settings from file;
10.3.1.127. In the appeared window, specify the path to the file 1222_Form;
10.3.1.128. Click the Open button;
All settings of the form will be imported.
Note: after importing the action settings, it is necessary to specify the settings of the mail account:
10.3.1.129. Click the Advanced button in the Action field;
10.3.1.130. Select the action Send Email;
10.3.1.131. Specify the settings for the mail account in the fields MAIL: Server, MAIL: Port, MAIL: SSL certificate, MAIL: Authentication type, MAIL: Username, MAIL: Password;
10.3.1.132. Click OK;
10.3.1.133. Select Menu > Save.
10.3.1.134. Close the object by clicking on the corresponding button.
10.3.2. Next

