4.2. Création de l'Objet 1301 Client
4.2.1 Creating Object 1301 Customer
Knowing how to create simple objects, workspaces, how to add objects and users, you may continue and go on to create a number of other basic objects required for the information system.
The next object is a table to store and display customers data. This object is created similar to 1401 User.
To add an object:
4.2.1.1. Select Menu > Configuration;

4.2.1.2. In the appeared window click Yes;

4.2.1.3. In the window Configuration Development in the field Connection select the connection SUPPORT;
4.2.1.4. In the field Password, type in 1111;
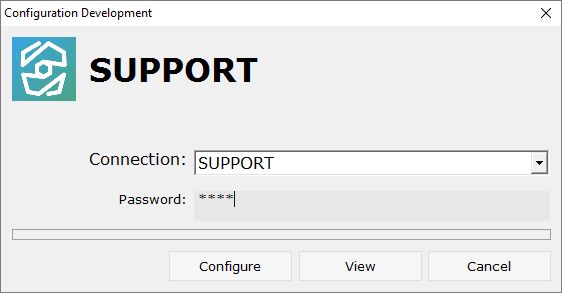
4.2.1.5. Click Configure;
4.2.1.6. Open the folder 2.Objects;
4.2.1.7. Open the context menu by right-clicking on the folder 1300 Customer;

4.2.1.8. Choose New Object > New table;

4.2.1.9. In the window Properties in the field Object Code type in 1301, in the field Object Name type in Customer.

4.2.2. Grid Design
To design grid:
4.2.2.1. Open the object 1301 Customer by double-clicking left mouse button;

Note: if you want to study grid design process in detail, follow the steps 4.2.2.2 - 4.2.2.10. If you already know how to do this, skip the steps 4.2.2.2 - 4.2.2.10 and go to the step 4.2.2.11.
4.2.2.2. In the field Data Source specify the object - vw_clients;

4.2.2.3. In system fields Record ID, Date & Time (Created), Date & Time (Updated), Date & Time (Closed), User ID, select accordingly fields user_id, dttmcr, dttmup, dttmcl, userid;

4.2.2.4. Open the context menu by right-clicking in the empty space of the object, choose Add a column and select columns client_id, client_fullname;

4.2.2.5. Select each column by clicking the left mouse button on any line of the table, specify in the field Caption the displayed name of the column - ID, Full Name respectively;


4.2.2.6. Move the mouse pointer over the border between the headings of the first and the second column;
4.2.2.7. Click the left mouse button and, without releasing it, change the width of the first column;

4.2.2.8. In the same way set the required width of the other columns;

4.2.2.9. Select the last column and in the field Auto Size specify the value 1-Yes - column size will vary depending on the free space of the screen;

4.2.2.10. In the fields Allow Additions, Allow Editions, Allow Deletions select 1-Yes;

Note: If you followed the steps 4.2.2.2 - 4.2.2.10, skip steps 4.2.2.11 - 4.2.2.16 and go to step 4.2.2.17.
4.2.2.11. Download the file archive containing the settings of objects;
4.2.2.12. Extract the files from the downloaded archive;
4.2.2.13. Open the context menu by right-clicking in the data area;

4.2.2.14. Select Import settings from the file;
4.2.2.15. In the appeared window specify the path to the file 1301_Table;

4.2.2.16. Click the Open button;
All table settings will be imported.

4.2.2.17. Save changes by selecting Menu > Save or by clicking the appropriate button in the toolbar.

4.2.3. Form Design
To change the form to input / output / change / delete a record to / from the database:
4.2.3.1. Go to Form Design by selecting View > Form Design, or by pressing the appropriate button in the toolbar;

Note: if you want to study form design process in detail, follow the steps 4.2.3.2 - 4.2.3.28. If you already know how to do this, skip the steps 4.2.3.2 - 4.2.3.28 and go to the step 4.2.3.29.
4.2.3.2. In the field Data Source choose database object - t_clients;

4.2.3.3. In system fields Record ID, Date & Time (Created), Date & Time (Updated), Date & Time (Closed), User ID choose fields from the table - client_id, dttmcr, dttmup, dttmcl, userid;

4.2.3.4. Click the left mouse button on the Field button on the toolbar;

4.2.3.5. Move the mouse pointer to the data area;
4.2.3.6. Press the left mouse button and, without releasing it, outline the size of the field;

4.2.3.7. In the field Control Source select client_id;

4.2.3.8. Because customer ID is automatically specified in the database, access to the field should be closed. Specify the value 0-No in the field Enabled;

4.2.3.9. In the field Back Color choose a background color;

4.2.3.10. Likewise add two more fields, each subsequent lower than the previous;

4.2.3.11. In the field Control Source for each of the added fields, choose accordingly client_name, client_surname;


4.2.3.12. Click the left button of the mouse on the Label button on the toolbar;

4.2.3.13. Move the mouse pointer to the data area;
4.2.3.14. Press the left mouse button and, without releasing it, outline the size of label so that the label is left to the field client_id;

4.2.3.15. In the field Caption type in ID;

4.2.3.16. Likewise add two more labels (one label per each field);

4.2.3.17. In the field Caption for each of the added labels specify accordingly First Name, Last Name;

4.2.3.18. Select Edit > Select All;

4.2.3.19. In the field Height specify the height of the elements - 0,6; press Enter;

4.2.3.20. Select all the labels by clicking the left mouse button and, without releasing it, outlining the area on the screen with the mouse pointer;

4.2.3.21. In the field Width specify the width of the labels - 3; press Enter;

4.2.3.22. Select all fields;

4.2.3.23. In the field Width specify the width of the field - 6; press Enter;

4.2.3.24. Select Edit > Select All;

4.2.3.25. Select Arrange > Align > Top;

4.2.3.26. Select Arrange > Align > Left;

4.2.3.27. Move the mouse pointer over the elements, press the left mouse button and, without releasing it, move all the elements in the upper left corner;

4.2.3.28. Move the mouse pointer to the lower right corner of the data area, press the left mouse button and, without releasing it, reduce the size of the data area to a minimum;

Note: If you followed the steps 4.2.3.2 - 4.2.3.28, skip steps 4.2.3.29 - 4.2.3.34 and go to step 4.2.3.35.
4.2.3.29. Download the file archive containing the settings of objects;
4.2.3.30. Extract the files from the downloaded archive;
4.2.3.31. Open the context menu by right-clicking in the data area;

4.2.3.32. Select the menu item Import settings from file;
4.2.3.33. In the appeared window, specify the path to the file 1301_Form;

4.2.3.34. Click the Open button;
All settings of the form will be imported.

4.2.3.35. Save changes by clicking Menu > Save or by pressing the appropriate button in the toolbar;

4.2.3.36. Close the object by clicking the appropriate button.

4.2.4. Next