9.2. Création de l'Objet 1204 Courrier Entrant
9.2.1. Creating Object 1204 Incoming mail
To create an object 1204 Incoming mail:
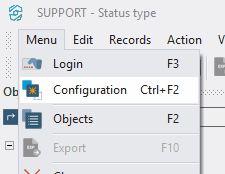
9.2.1.1. Select Menu > Configuration;
9.2.1.2. In the appeared window, click Yes;

9.2.1.3. In the Configuration Development window, in the Connection field, select the SUPPORT connection;
9.2.1.4. In the Password field, enter 1111;
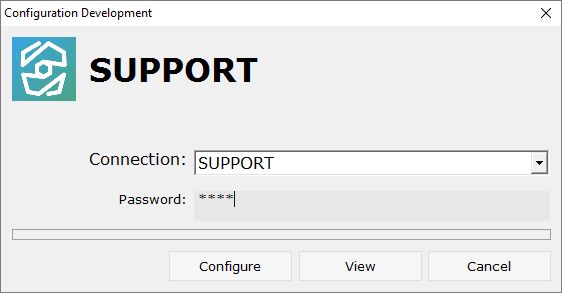
9.2.1.5. Click Configure;
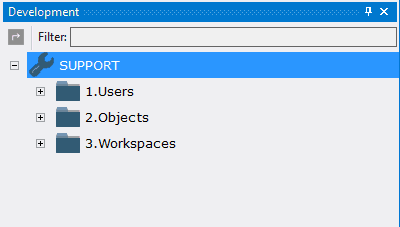
9.2.1.6. Open the folder 2.Objects configuration;
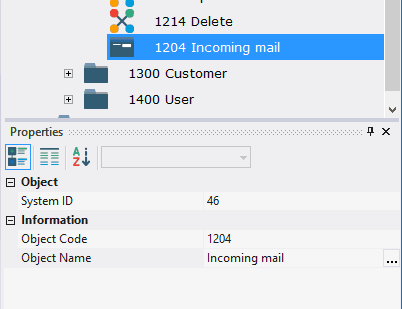
9.2.1.7. Call the context menu of the folder 1200 Comments by right-clicking the mouse;
9.2.1.8. Select New Object > Table;
9.2.1.9. In the Properties window, enter 1204 in the Object Code field, enter Incoming mail in the Object Name field.
9.2.2. Grid Design
To change the table:
9.2.2.1. open object 1204 Incoming mail for modification by double-clicking the left mouse button;
Note: if you want to study grid design process in detail, follow the steps 9.2.2.2 - 9.2.2.13. If you already know how to do this, skip the steps 9.2.2.2 - 9.2.2.13 and go to the step 9.2.2.14.
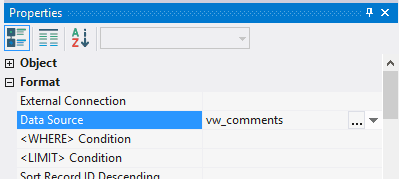
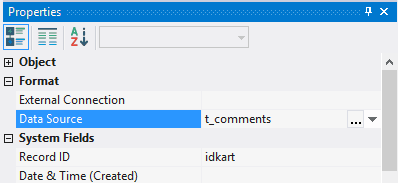
9.2.2.2. In the field Data Source specify the object - vw_comments;
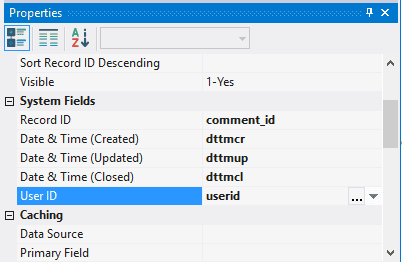
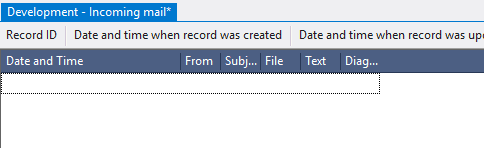
9.2.2.3. In system fields Record ID, Date & Time (Created), Date & Time (Updated), Date & Time (Closed), User ID, select accordingly fields file_id, dttmcr, dttmup, dttmcl, userid;
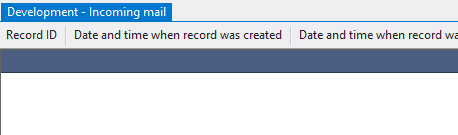
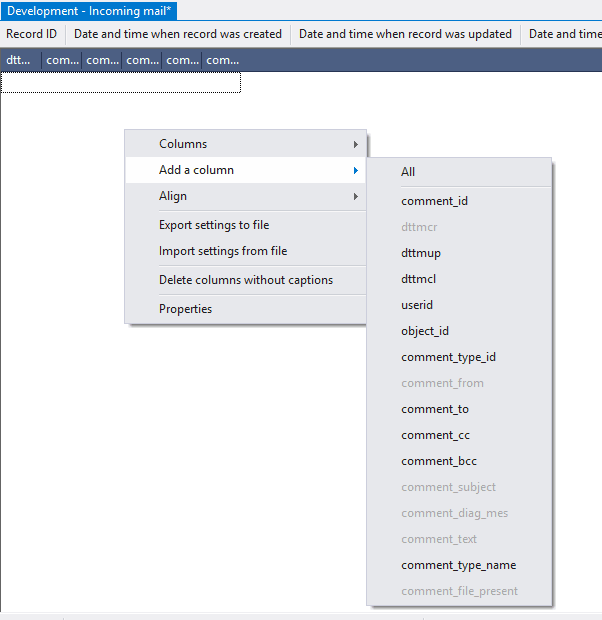
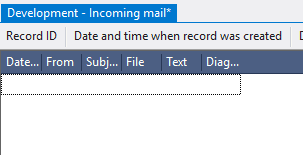
9.2.2.4. Open the context menu by right-clicking in the empty space of the object, choose Add a column and select columns dttmcr (comment creation date and time), comment_from (message sender), comment_subject (message subject), comment_file_present (attached file), comment_text (comment text), comment_diag_mes (diagnostic message generated when analyzing the subject of the message);
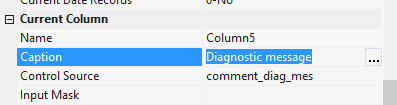
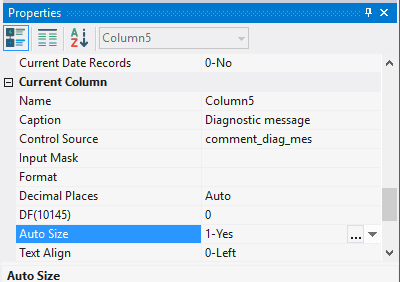
9.2.2.5. Select each column by clicking the left mouse button on any line of the table, specify in the field Caption the displayed name of the column - Date and Time, From, Subject, File, Text, Diagnostic message accordingly;
9.2.2.6. Move the mouse pointer over the border between the headings of the first and the second column;
9.2.2.7. Click the left mouse button and, without releasing it, change the width of the first column;
9.2.2.8. In the same way set the required width of the other columns;

9.2.2.9. Select the last column and in the field Auto Size specify the value 1-Yes - column size will vary depending on the free space of the screen;
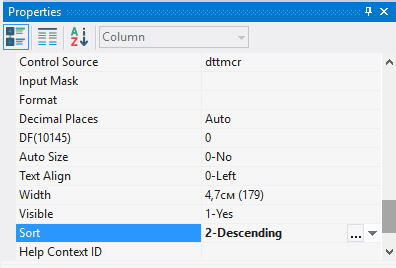
9.2.2.10. выделить колонку dttmcr и установить в поле Сортировка значение 2-по убыванию;
9.2.2.10. Select the column dttmcr and set the Sort field to 2-descending;
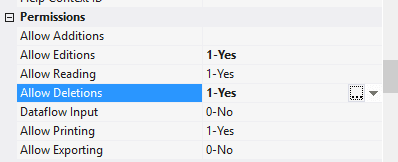
9.2.2.11. In the fields Allow Editions, Allow Deletions select 1-Yes;
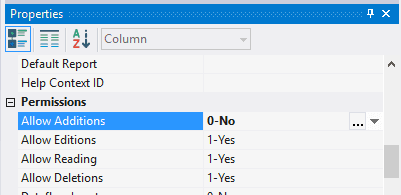
9.2.2.12. In the field Allow Additions, select 0-No;
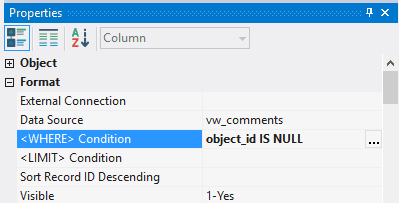
9.2.2.13. In the <WHERE> Condition field, specify the value object_id IS NULL;
Note: If you followed the steps 9.2.2.2 - 9.2.2.13, skip steps 9.2.2.14 - 9.2.2.19 and go to step 9.2.2.20.
9.2.2.14. Download the file archive containing the settings of objects;
9.2.2.15. Extract the files from the downloaded archive;
9.2.2.16. Open the context menu by right-clicking in the data area;

9.2.2.17. Select Import settings from the file;
9.2.2.18. In the appeared window specify the path to the file 1204_Table_1;
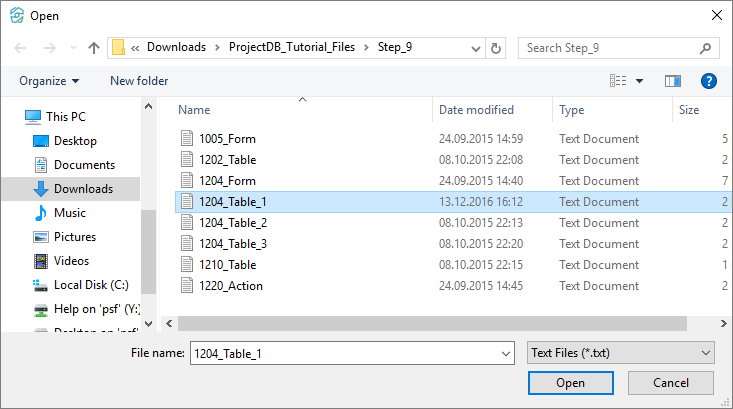
9.2.2.19. Click the Open button;
All table settings will be imported.

9.2.2.20. Save changes by selecting Menu > Save or by clicking the appropriate button in the toolbar.
9.2.3. Form Design
To change the form:
9.2.3.1. Go to Form Design by selecting View > Form Design, or by pressing the appropriate button in the toolbar;
Note: if you want to study form design process in detail, follow the steps 9.2.3.2 - 9.2.3.35. If you already know how to do this, skip the steps 9.2.3.2 - 9.2.3.35 and go to the step 9.2.3.36.
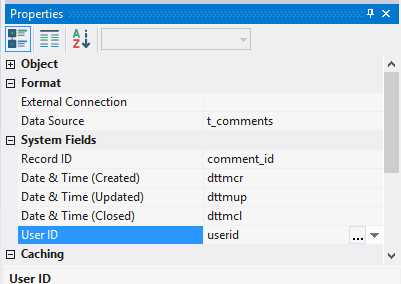
9.2.3.2. In the field Data Source choose database object - t_comments;
9.2.3.3. In system fields Record ID, Date & Time (Created), Date & Time (Updated), Date & Time (Closed), User ID choose fields from the table - comment_id, dttmcr, dttmup, dttmcl, userid;
9.2.3.4. Click the left mouse button on the Field button on the toolbar;
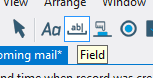
9.2.3.5. Move the mouse pointer to the data area;
9.2.3.6. Press the left mouse button and, without releasing it, outline the size of the field;

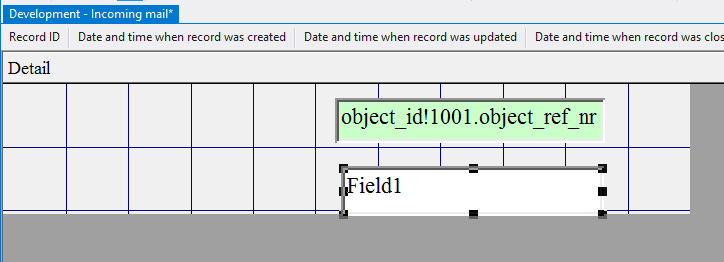
9.2.3.7. In the Control Source field, click the Advanced button;
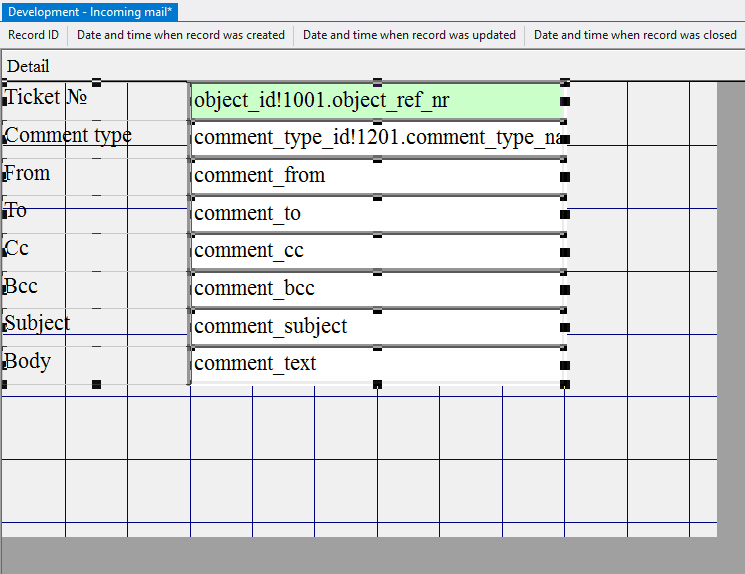
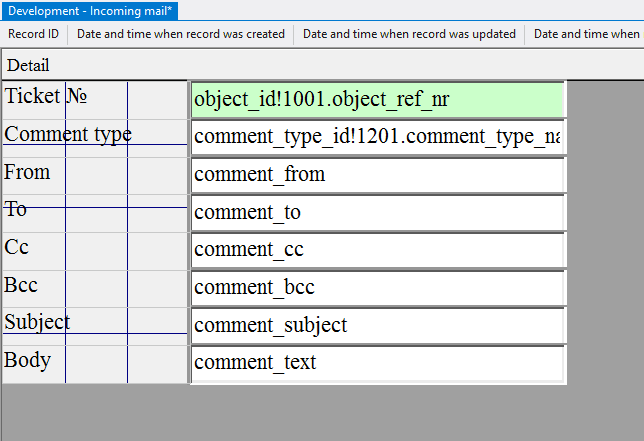
9.2.3.8. Enter the value object_id!1001.object_ref_nr;
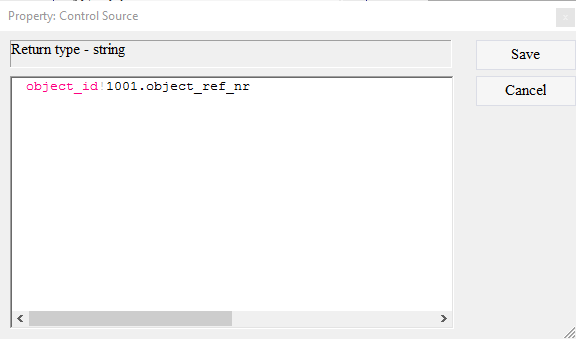
9.2.3.9. Click the Save button;
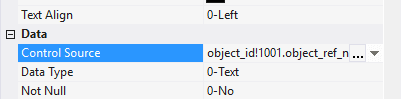
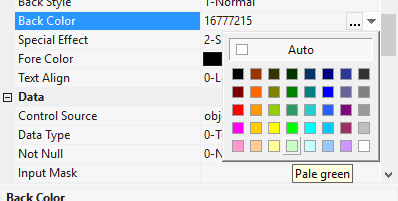
9.2.3.10. In the Back Color field, select the background color;
9.2.3.11. Similarly, add one more field below;
9.2.3.12. In the Control Source field, click the Advanced button;
9.2.3.13. Enter the value comment_type_id!1201.comment_type_name;
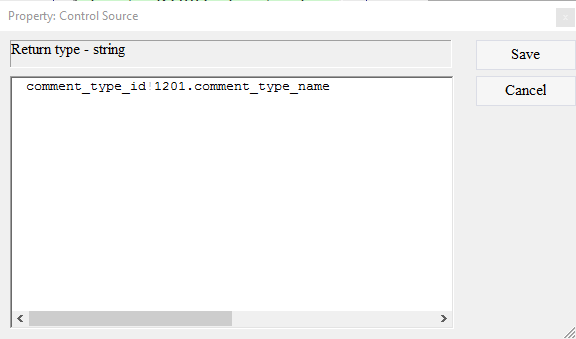
9.2.3.14. Click the Save button;
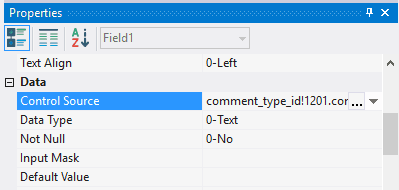
9.2.3.15. In the Enabled field, specify the value 0-No;

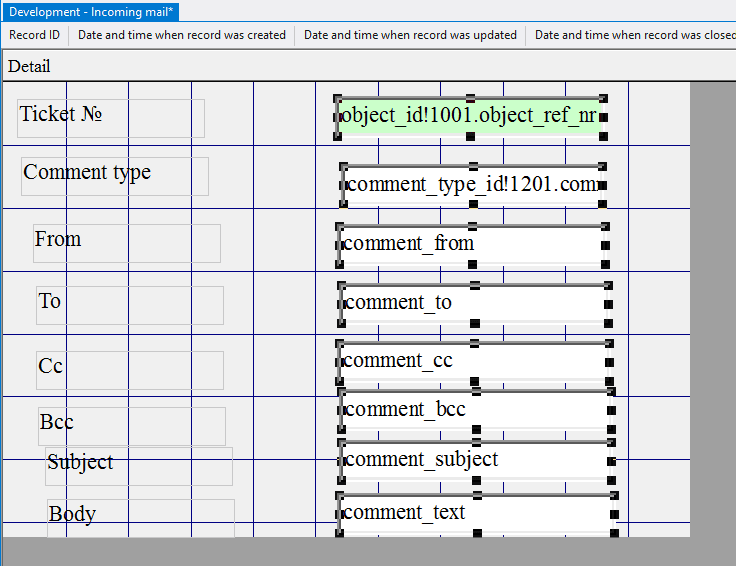
9.2.3.16. Similarly, add six more fields (each subsequent lower than the previous one);

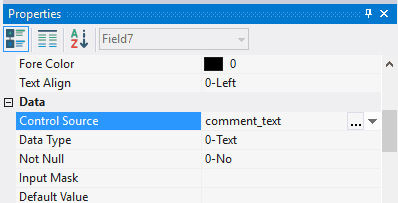
9.2.3.17. In the Control Source field for each added, choose accordingly comment_from, comment_to, comment_cc, comment_bcc, comment_subject, comment_text;
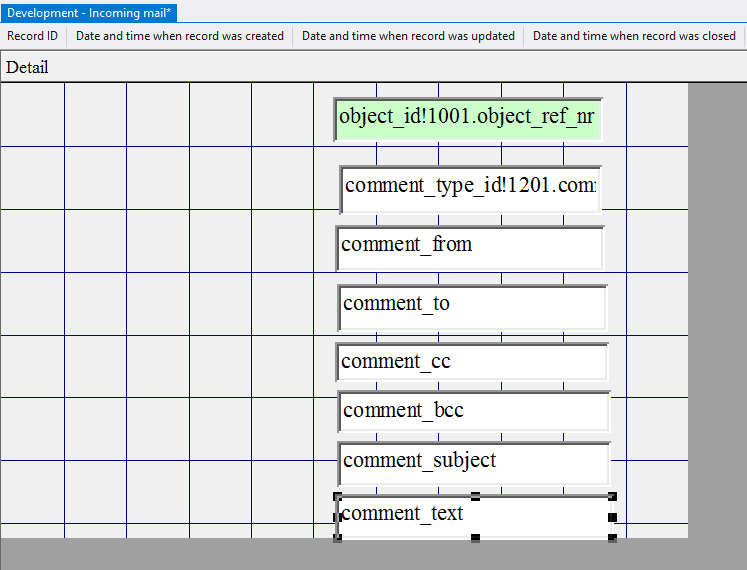
9.2.3.18. Left-click on the Label button on the toolbar;

9.2.3.19. Move the mouse pointer to the data area;
9.2.3.20. Press the left mouse button and, without releasing it, outline the size of label so that the label is left to the top field;
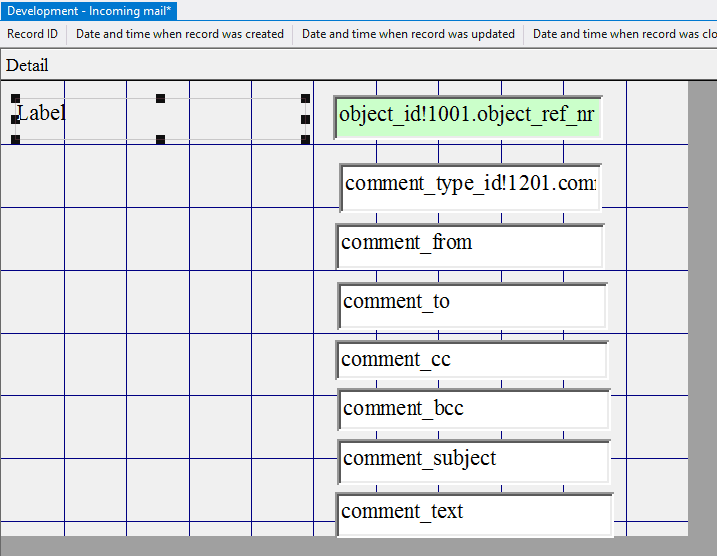
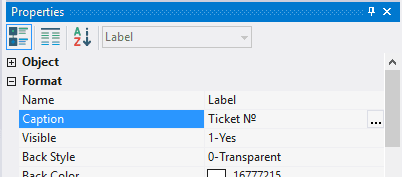
9.2.3.21. In the Caption field enter the Ticket №;
9.2.3.22. Similarly, add seven more labels (one for each field);
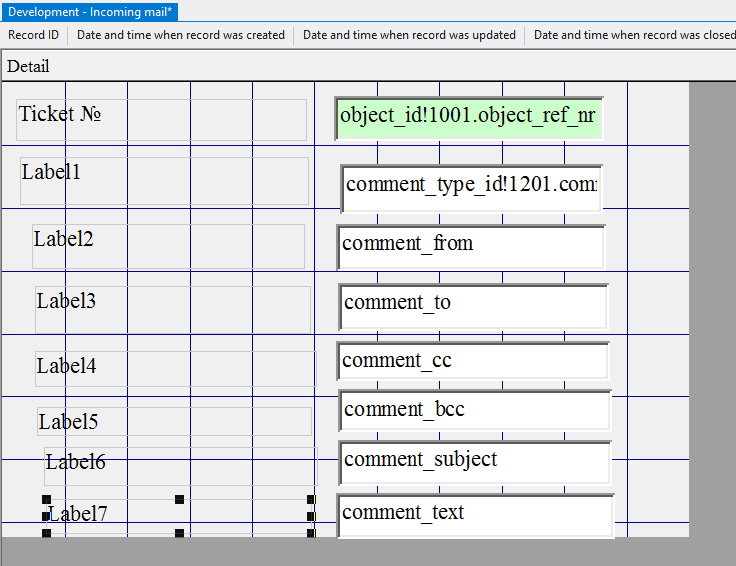
9.2.3.23. In the Caption field of each of the labels enter Comment Type, From, To, To, Copy, Bcc, Subject, Body, respectively;
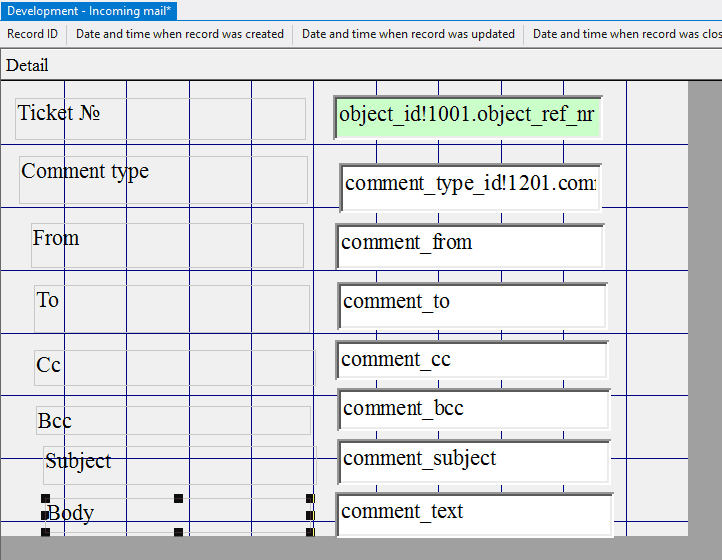
9.2.3.24. Select Edit > Select All;
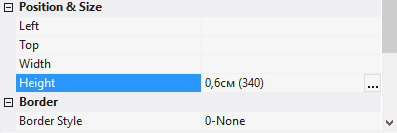
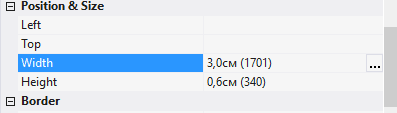
9.2.3.25. In the Height field specify the height of the elements - 0,6; press the Enter key;
9.2.3.26. Select all the labels by clicking the left mouse button and, without releasing it, outlining the area on the screen with the mouse pointer;
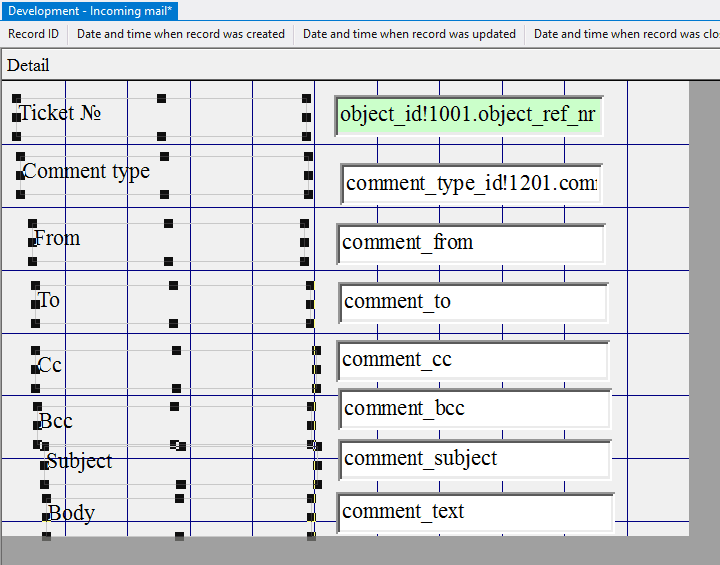
9.2.3.27. In the Width field specify the width of the labels - 3; press the Enter key;
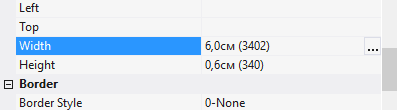
9.2.3.28. Select all fields;
9.2.3.29. In the Width field specify the width of the fields - 6; press the Enter key;
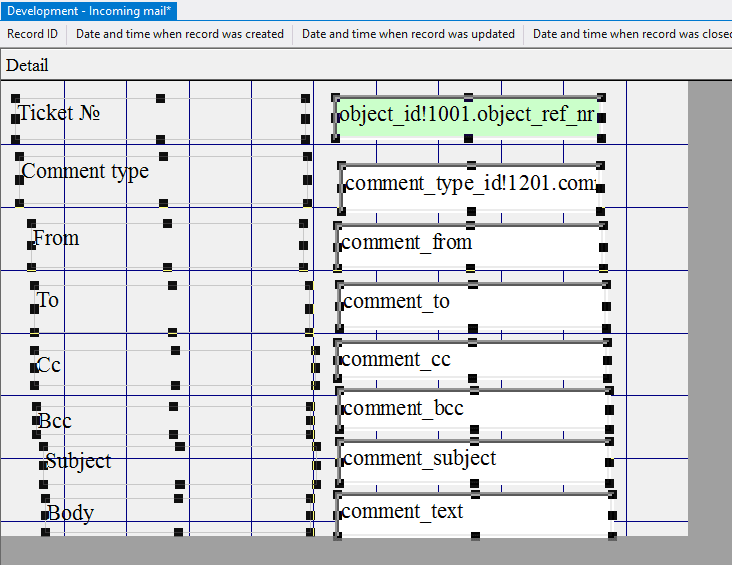
9.2.3.30. Select Edit > Select All;
9.2.3.31. Select Arrange > Align > Top;
9.2.3.32. Select Arrange > Align > Left;
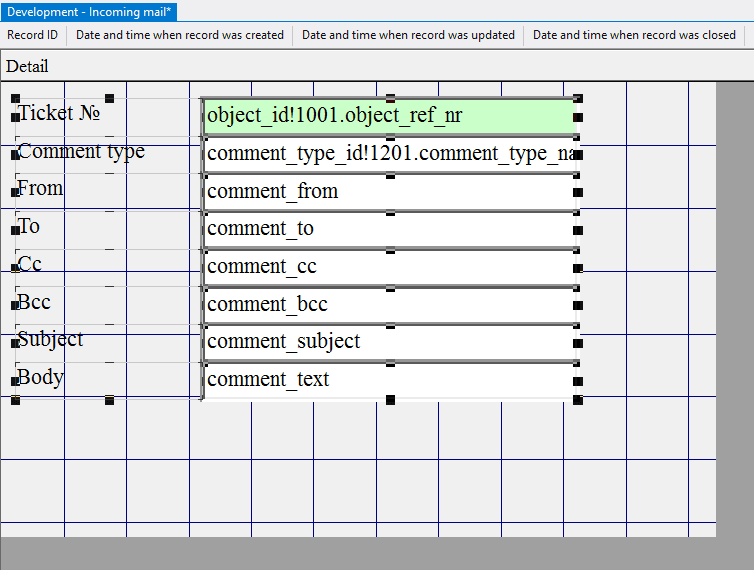
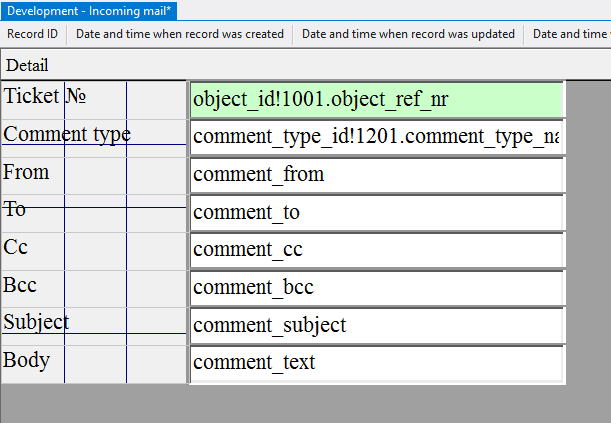
9.2.3.33. Move the mouse pointer over the elements, press the left mouse button and, without releasing it, move all the elements in the upper left corner;
9.2.3.34. Move the mouse pointer to the lower right corner of the data area, press the left mouse button and, without releasing it, reduce the size of the data area to a minimum;
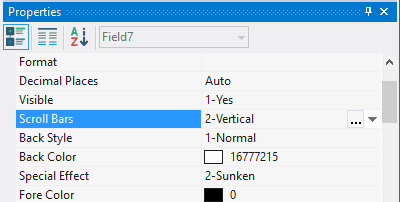
9.2.3.35. Select the field comment_text - this field will occupy the remaining free space when working in the form and store multi-line text, so you should allow the text to scroll vertically by setting the Scroll Bars field to 2-Vertical;
Note: If you followed the steps 9.2.3.2 - 9.2.3.35, skip steps 9.2.3.36 - 9.2.3.41 and go to step 9.2.3.42.
9.2.3.36. Download the file archive containing the settings of objects;
9.2.3.37. Extract the files from the downloaded archive;
9.2.3.38. Open the context menu by right-clicking in the data area;
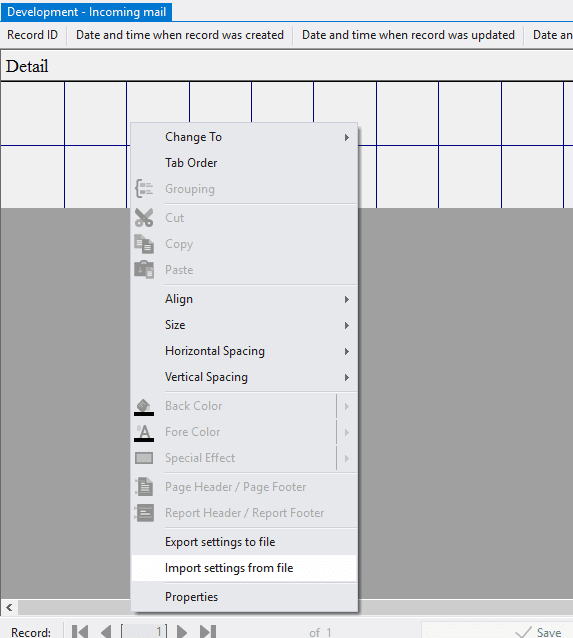
9.2.3.39. Select the menu item Import settings from file;
9.2.3.40. In the appeared window, specify the path to the file 1204_Form;
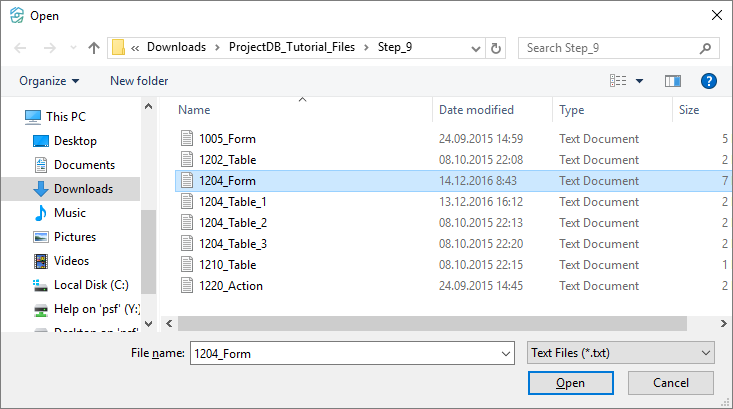
9.2.3.41. Click the Open button;
All settings of the form will be imported.
9.2.3.43. Close the object by clicking on the corresponding button.
9.2.4. Next